Seems like we have several users of the Affinity Suite of tools. Could be good for us to have a topic to share what we’ve built. I’ll kick things off with just a simple sheet of dots on a page. I use this to fill empty space in other printable designs for note taking.
To use this document to fill an empty area, hold down the Command key (or the Control key on Windows) and drag your mouse cursor to select the dots you want. Cut and paste them into the new document you want to add them to. The pasted dots lose their grouping when you do this, so don’t forget to create a new group (Command-g) in the new document.
Downloads
I’m also adding a PDF in case you aren’t a Affinity Suite user and just want to print out a page of dots. Let me know if you have any issues.
This is the 6-hex wide indexed (see below) hex flower I use to make nested (see below) maps. The header contains the name of your campaign, the name of the area mapped, an address (see below) and map scale. There is a small dot grid for notes and the hex flower itself with generous hexes so you can include more than a single icon of information in the hex. The large hex shows the boundaries of the hex at the next largest scale in nested maps. The edge hexes are fully present though they would be shared by the neighboring hex(es) when leaving the edge of this map.
Indexing
The hexes in the hex flower are indexed using two-digit numbers where the first number is the row (starts with row zero) and the second number is the column (which snake back and forth and also starts at zero). There are a total of 9 rows and 7 columns in this hex flower. These indexes can be used for notes about the content of the hex as well as for full addressing nested hexes.
Nesting and Addressing
I usually start with a 6-mile hex scale and then go down (1-mile or 880-feet) or up (36-mile, 216-mile or larger) as needed. When I address I start with a colon and then the hex index. I assume that the first map is the center of its parent map so its address is always “:43” as 43 is the index of the very center of the hex flower. If I were to scale up from there I would assume the parent map is the center of the original map’s grandparent map and it’s address would become “:43” while the original map’s address would become “:43:43”.
For example, let’s say I have maps going from 36-mile hexes down to 1-mile hexes. The address for the 36-mile hex map would be “:43” as it’s the top level map I have and presumed to be the very center of it’s parent map if I were to ever feel the need to create one. At this point my players have explored hexes 32 and 43 of the 36-mile map and I’ve created 6-mile scaled maps for each; addressed “:43:32” and “:43:43” respectively. Hex 63 in the 6-mile map addressed “:43:32” has a number of barrows and I felt I needed a 1-mile scale map of that area so I created a new map with the address “:43:32:63”. Using this addressing scheme I can point to any map the network of maps I am using for my campaigns. With my notes being a general or granular as is appropriate.
Downloads
I’m including both the Affinity Designer file for those who want to make mods and a PDF if you just want to print it out. I’m releasing these under the Creative Commons Attribution-NonCommercial 4.0 International License license if you want to include the page in a larger work you’re publishing.
Let me know if you have any questions. I tried to explain the addressing as best I can, but it’s not obvious so I won’t be surprised by questions.
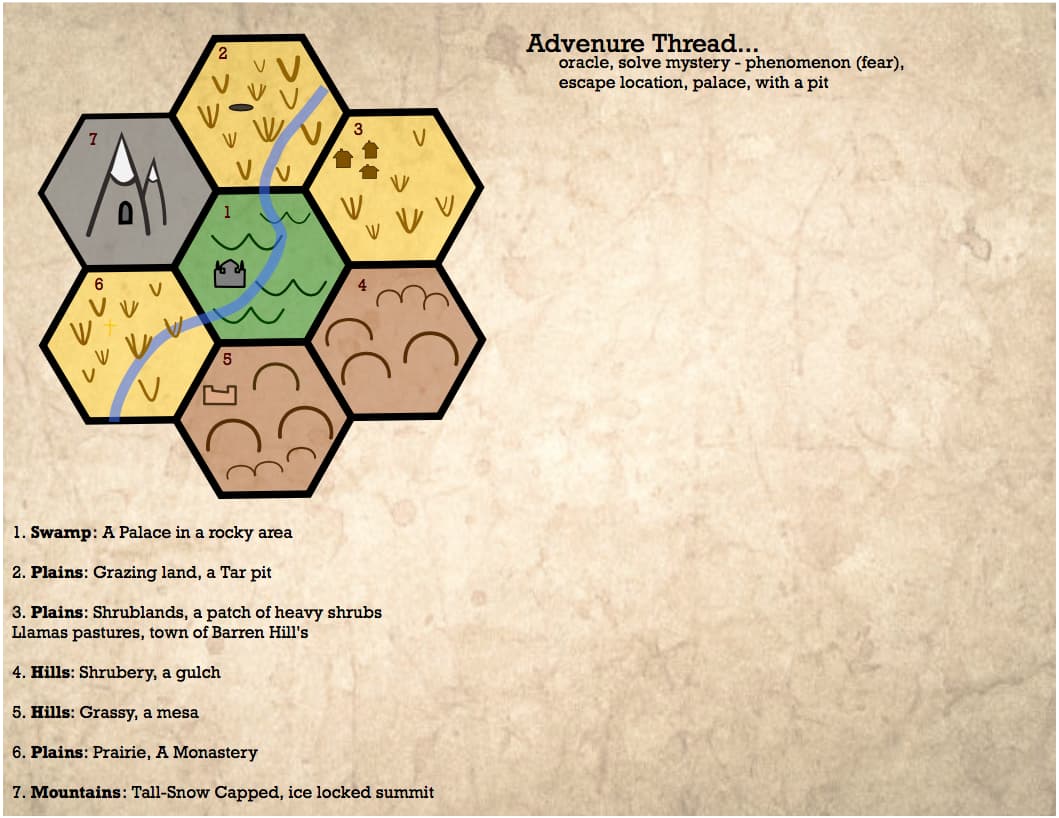
Here is something I came up with a few years back using Affinity, I wish I could find the original file as I had started adding a bunch of details and ideas on a hidden layer
Thanks, it was only my second time using Affinity designer so it was a learn as I go kind of project, digital art tools are not something I use at my job. Maybe one day I will get the time to really to sit down and learn how to use digital paint and vector tools.